

You can find a lot of tutorials on the "ticker-tape technique" online, I can recommend one by Ruth from Charly and Ben's Crafty Corner as I learned this technique in her workshop. I'll just quickly outline the process here, with the differences I made.
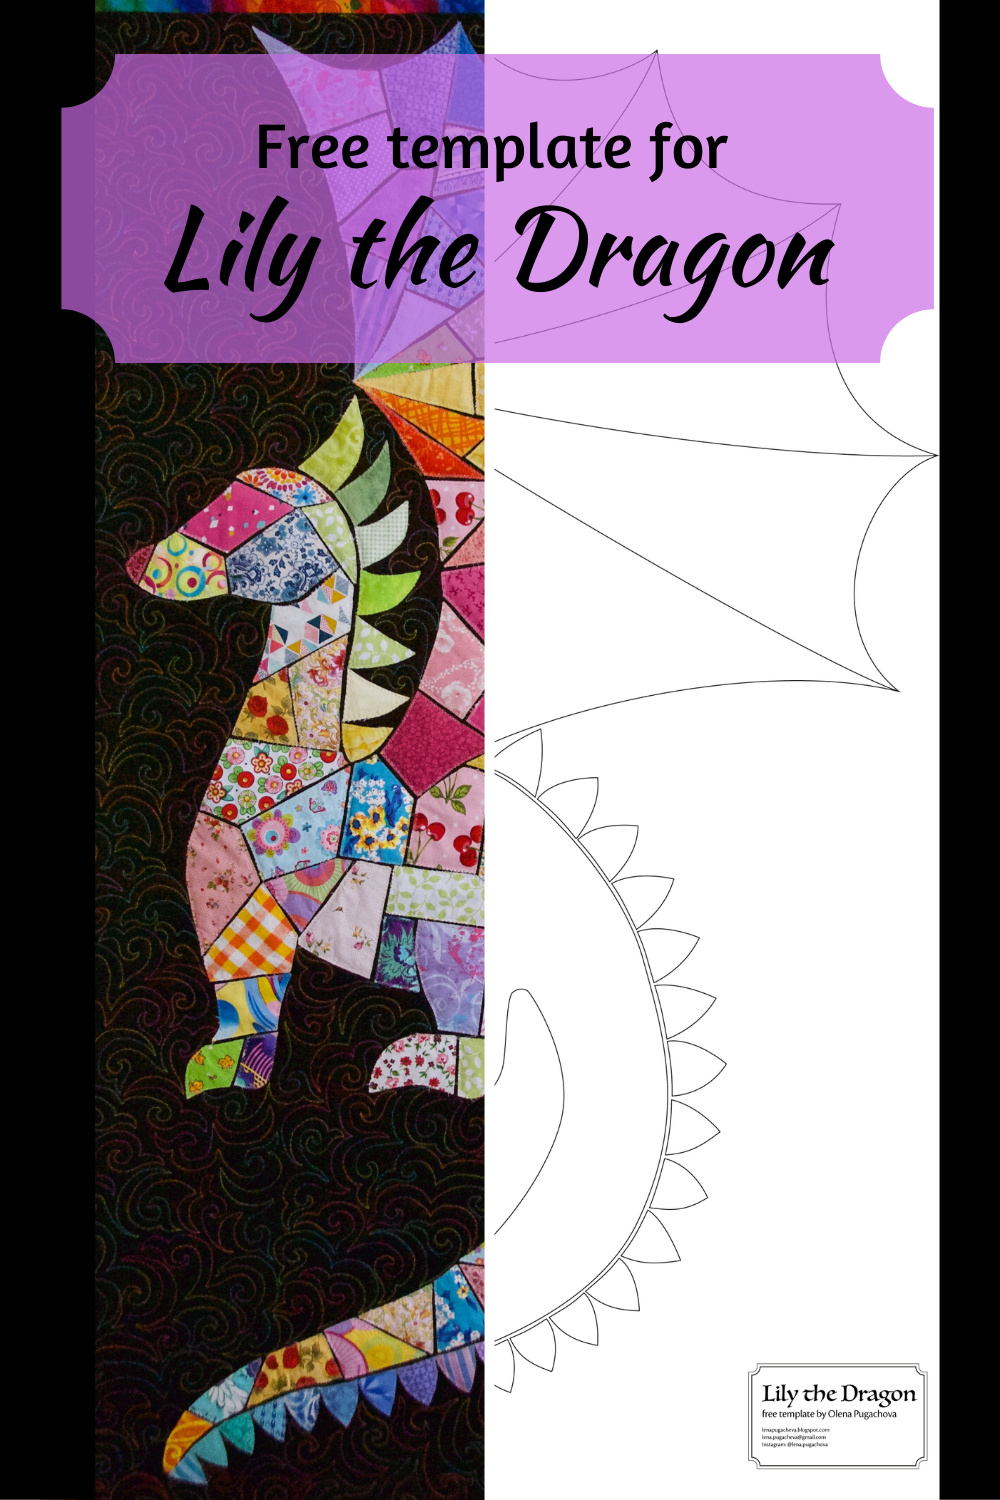
- So, to begin with, you can download the template and print it out (use "poster" setting in the Acrobat printing menu if you are printing it on a home printer and it will split the image onto multiple pages which you'll have to glue together). The image is 30'' by 50'', but if you want a different size, you can tinker with image scale, just bear in mind that if you make it too small it will get too fiddly.

- Next, you'll need to transfer the template onto your background fabric. I used black background, and this is what makes her really pop and creates a stained glass effect, but it will also make image transfer trickier. I can suggest making holes along the lines in the paper template and tracing them with chalk. Alternatively, just cut out the large shapes and trace them around with a white pencil or washable marker (in this case you can just freehand the spines). I didn't stitch around the outline as I thought it would not go with the stained glass effect.
- Assemble your quilt sandwich and baste it in your preferred method.
- Now you can get out your scrap basket and start playing. If you go for a black background, bright and light-coloured fabrics are best, in my case I used patterned ones for the body and blenders for the wing and the spines. The exact shape and positioning of the pieces will depend on the scraps you have, you'll just need to trim them to follow the line of the template on the outside. Leave from 1/8'' to 1/4'' between the pieces. Ones you fit several pieces in place, secure them with pins, glue or fusible tape and take the sandwich to the machine. I used quite loose zigzag stick with a neutral thread to stitch around all the pieces. Again, check out Ruth's tutorial for the details.

- Continue the process bit by bit until you fill in the outline. Because you are stitching through the quilt sandwich, it will also mean you have already quilted the dragon shape!
- So, all that is left is quilting the space around her, and here the sky is the limit - you can create a whimsical landscape around her or just go for echo quilting. I tried to use Angela Walter's Swirl hook pattern, it didn't turn out great, to be honest, but I still love the overall effect created by the bright variegated thread (it was one of YLI machine quilting threads).
I really hope this is helpful, if you have any questions, please feel free to contact me, and if you make your own dragon, please send a pic or tag me on Instagram, I'd be thrilled to see it!
Linking up to:
Off the Wall Friday at Creations by Nina-Marie
Can I Get a Whoop Whoop? at Confessions of a Fabric Addict
TGIFF at Devoted Quilter
This is an amazing, beautiful and colorful dragon!!
ReplyDeleteSuch a fun dragon!
ReplyDeleteLily is a beauty! Thanks for sharing her template so dragons can freely mulitply in the quilting world.
ReplyDeleteLily is gorgeous! Thank you for sharing the template and thanks for linking to TGIFF this week :)
ReplyDeleteWow. Fantastic job.
ReplyDeleteThank you for sharing the template. Thinking of making two for my Great-grandchildren .They both love dragons. Your quilt is absolutely stunning ❤
ReplyDeleteYo haré uno para una camiseta negra
ReplyDeletethanks for the info. absolutely gorgeous
ReplyDeleteI am really really new at this. is this applique?
ReplyDeleteBeautiful and definitely one to try. Thank you for sharing.
ReplyDeleteLove this. I do not know how to print as poster
ReplyDelete