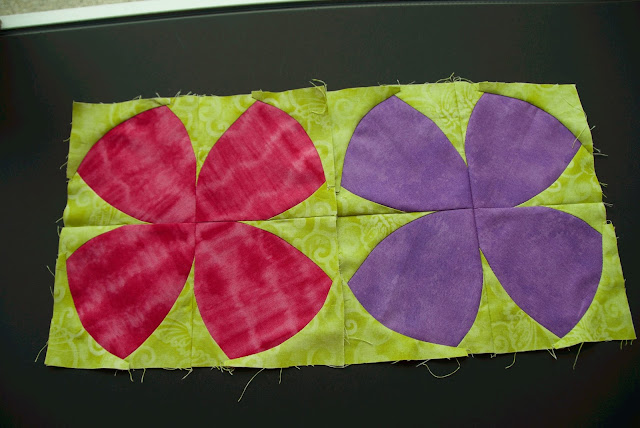
To mark the arrival of spring I'd like to share with you a nice little flower pattern that would be nice to try for somebody who is learning curve piecing or just wants to add some curvy zest to their piecing. It can look as modern or as traditional as you want it to depending on your fabric choices.
I designed it to go together with my butterfly pattern, it is compatible in size and style and together they can form lots of different layouts. I played with a couple of options for a bed quilt here:
The flower is made up of four identical petals, so the pattern is just one petal 4'' squared, the resulting flower is thus 8'' squared (of course you can scale it up if you want to, but I wouldn't recommend scaling it down as some parts are quite small already).
Click here to view and download the pdf pattern for the hydrangea flower
You'll need:
- about A4 size piece of the background fabric (or scraps)
- about A4 size piece of the flower fabric (or scraps)
- freezer paper
- pencil or fabric marker
- pins, scissors for paper and fabric and piecing thread
Print out the pattern and trace it on freezer paper. Tracing on the dull side mirrors the image, tracing on the shiny side leaves the image looking as is, which is not a lot of difference in this case, but if you carefully compare the pink and the purple flowers in my photos, you'll notice they "rotate" in opposite ways. Make sure you trace the marks across the lines as they will be necessary to correctly align the pieces.
Cut out the pattern pieces and iron them to the wrong side of your fabric. Trace around the paper, don't forget the marks! I traced all four sets of pieces at once, to be able to chain piece the block.
Cut out the pieces, eyeballing the quarter inch seam allowance on all sides. Cut notches about 1/2 in to 3/4 in apart the concave (valley) curves - the curved sides of the background pieces.
Always keep the concave (valley) curve on top of your convex (mountain) curve, because the convex part stays flat, as you can see in the photo, whereas the concave piece ripples - in this way you can see what it's up to.
Stitch the pieces together and press the seams closed. Generally, I would press the seams under the petal piece, but in this case that would leave a gap in the edge, which is risky for further assembly, so I pressed the seams towards the background.
Pin background piece number two in place.
Stitch down and press the seam.
Now put the four petals together like you would any four patch. It's up to you to press the seams closed or open.
I turned my two blocks into mug rugs, but I'm going to make more to put together in a quilt.
Please enjoy and do share in the comments if you make yourself some flowers!
Linking up to Tips and Tutorials Tuesday at Quilting Jetgirl
Linky Tuesday at Freemotion by the River


Very nice tutorial!
ReplyDeleteGentle curves are a great place to start sewing curves and circles. Great tutorial and thank you so much for linking up and sharing!
ReplyDeleteHi Olena: I still haven't made the butterfly although I keep thinking about it and now you've given me a lovely flower to try as well....My days are just to short with working and all.....but one day.
ReplyDeletePretty! Do you draw out all your curved designs, or do you improvise them sometimes?
ReplyDeleteThanks for the tutorial. The flower blocks are so gorgeous!
ReplyDelete