This tutorial will be linked to Tips and Tutorials Tuesday - a roundup of wisdom from around the net hosted by Yvonne @ Quilting Jetgirl - visit and learning something new and interesting.
Also make sure you visit Handmade Halloween linky party hosted by Bernie @ Needle and Foot for some spooky inspiration, there's still time to make your Halloween projects.
I'm excited to show you a fun Halloween (or just autumn decor) project, with a cheerful bit of color and practicality all in one.
I call it the Candy Holder, but obviously you can use it to hold any odd stuff (including sewing supplies), or probably to store your Halloween decor elements from one year to the next.
My inspiration for this came from this tutorial for a cute fabric tea-pot, which can also be used for storing stuff and makes a nice present. Last year I tried to repeat it small-scale with orange fabrics and made these cuties that my kids now use as trinket boxes:
This year I decided to go big and made the pumpkin about life-size, it measures 7'' tall about 8'' across the bottom. I adjusted the pattern for the larger size increasing the number of segments and changing the shape somewhat. I tried out the first draft of the pattern with another pumpkin, which I didn't like shape of, so I now have quite a harvest:
And I put together a tutorial with tons of step-by-step photos. This is my first sewing tutorial, so I welcome all critical remarks and corrections, and I'd be absolutely thrilled if you made your own pumpkin and shared in the comments!
We'll start with the pumpkin "body". Trace the pattern for the body segment (I used freezer paper for my templates) and cut out 10 pieces from the outside fabric and 10 from the inside fabric. The segment pattern already includes a 1/4 inch seam allowance. I would recommend not to trace and cut the patterns for the bottom and the lid until you assemble the body and check if its finished size is the same as in the pattern (because everybody has their own 1/4 inch, right?)
... stitch along the edge and flip the top and bottom pieces to form the next segment.
Stitch along the edge, don't worry, with a bit of Halloween magic it will all come out again.
Now pull the fabric gently out of the cocoon and say "Abracadabra"...
Nope, not a butterfly, but something vaguely resembling a pumpkin, don't you think?
Pin two opposing marks to two opposing seams in the bottom of the pumpkin body (as this is the inside bottom, the right side of it should touch the inside fabric).
Then pin the other two marks to the centers of two opposing segments and then add a couple of pins in between to line up the edge of the bottom with the edge of the body.
Stitch 1/4 inch from the edge and step back to admire.
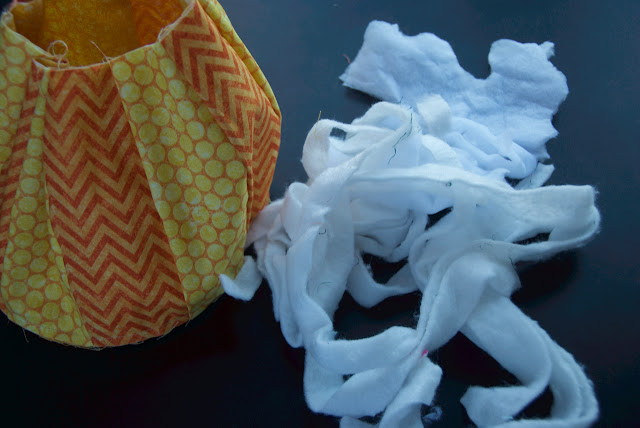
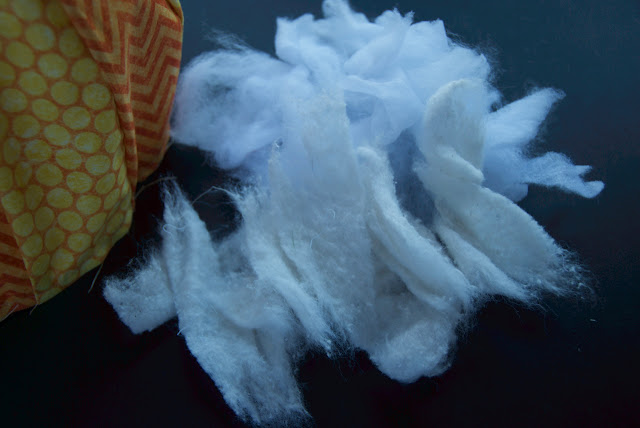
To avoid lumps if you're using batting scraps, they're best to be torn into smaller pieces and fluffed out a bit.
Also make sure you visit Handmade Halloween linky party hosted by Bernie @ Needle and Foot for some spooky inspiration, there's still time to make your Halloween projects.
I'm excited to show you a fun Halloween (or just autumn decor) project, with a cheerful bit of color and practicality all in one.
I call it the Candy Holder, but obviously you can use it to hold any odd stuff (including sewing supplies), or probably to store your Halloween decor elements from one year to the next.
 |
| I'll let you in on a secret - it's not really full of candy, there's fabric stuffed underneath actually... |
This year I decided to go big and made the pumpkin about life-size, it measures 7'' tall about 8'' across the bottom. I adjusted the pattern for the larger size increasing the number of segments and changing the shape somewhat. I tried out the first draft of the pattern with another pumpkin, which I didn't like shape of, so I now have quite a harvest:
And I put together a tutorial with tons of step-by-step photos. This is my first sewing tutorial, so I welcome all critical remarks and corrections, and I'd be absolutely thrilled if you made your own pumpkin and shared in the comments!
Pumpkin Candy Holder Tutorial
You can download my version of the pattern here (it's free!):Pumpkin pattern pdf to download
To make a Fabric Pumpkin Halloween Candy Holder you'll need:- about 1/3 yard of fabric for the "outside" (or various orange scraps to that amount)
- about 1/3 yard of fabric for the "inside"
- a scrap of green fabric
- card-stock (or plastic) for the bottom and the lid (about A3 page in all, I recycle boxes for that)
- cushion filling (hollowfiber) or batting scraps to stuff the shape
- matching thread
We'll start with the pumpkin "body". Trace the pattern for the body segment (I used freezer paper for my templates) and cut out 10 pieces from the outside fabric and 10 from the inside fabric. The segment pattern already includes a 1/4 inch seam allowance. I would recommend not to trace and cut the patterns for the bottom and the lid until you assemble the body and check if its finished size is the same as in the pattern (because everybody has their own 1/4 inch, right?)
 |
| I used the ditsy floral for the inside and interchanging dots and chevrons for the outside |
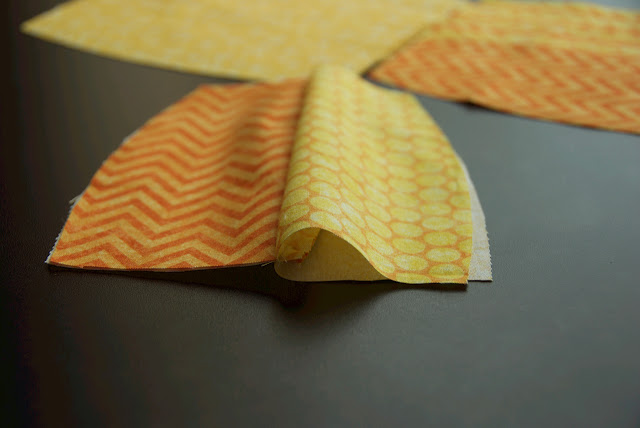
Now stack two pieces of inside fabric face to face and two pieces of outside fabric face to face and put one pair on top of the other, matching the edges.
 |
| Here they are shifted so you see which side is up |
Stitch 1/4 inch along one of the edges and flip over the upper and the lower pieces - you should see two right sides of the outside pieces on top and two right sides of the inside pieces in the bottom, the seam will stay hidden.
Repeat the sandwiching - add the next outside piece on top and another inside piece in the bottom ...
... stitch along the edge and flip the top and bottom pieces to form the next segment.
Continue in this way until all the ten segments are assembled one after the other.
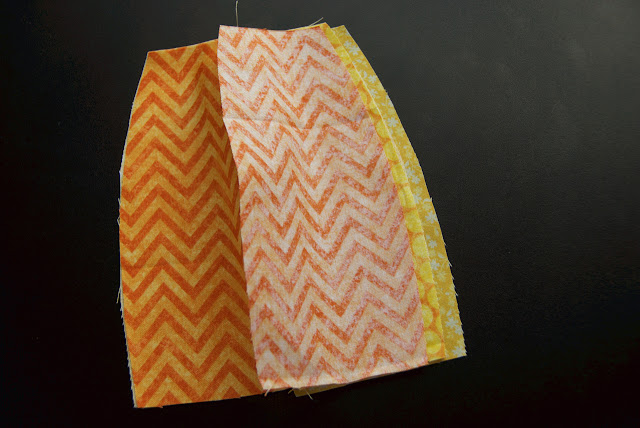
This is what you, hopefully, will see on the other side:
Now we have to connect the last segment to the first one to form a cone of sorts. Align the edge of the first inside piece with the edges of two last ones (both inside and outside). Pin them together to hold in place for the time being.
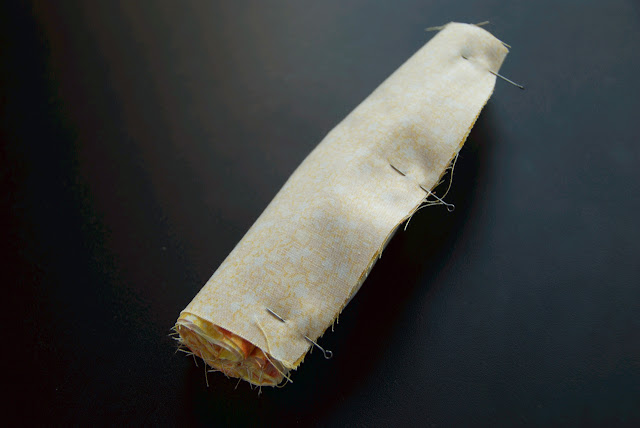
Now start wrapping the free outside piece around the whole assembled thing ...
... until its edge aligns with the pinned ones - then grab it tight and pin it to them, too, so that all the fabric is inside this one segment like in a cocoon.
Now pull the fabric gently out of the cocoon and say "Abracadabra"...
Nope, not a butterfly, but something vaguely resembling a pumpkin, don't you think?
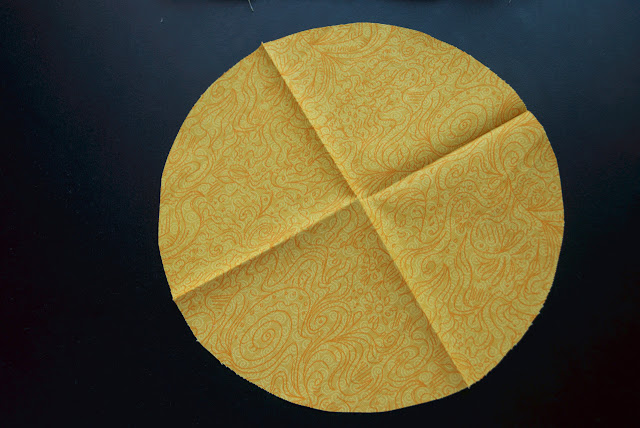
To fully become a pumpkin it needs a bottom, the inside one first. Put the assembled pumpkin body on top of the large circle in the pattern to make sure they line up (or measure both circumferences to make double-sure). The pattern of the bottom is without seam alliance, so you'll need to add a 1/4 inch when tracing it to fabric. (I trace the pattern to freezer paper, iron it to the fabric and then cut around it eyeballing 1/4 inch). Fold the fabric circle in two and then in two again and iron the fold to mark quarters.
Then pin the other two marks to the centers of two opposing segments and then add a couple of pins in between to line up the edge of the bottom with the edge of the body.
Stitch 1/4 inch from the edge and step back to admire.
The next step is to fill the shell and give it shape - pull out your filling (I used scraps of polyester batting - I have a whole bag collected from squaring quilts).
To avoid lumps if you're using batting scraps, they're best to be torn into smaller pieces and fluffed out a bit.
Fill the sections until it holds the shape well when handled - it should be rather tight but bouncy (you've got to fill it).
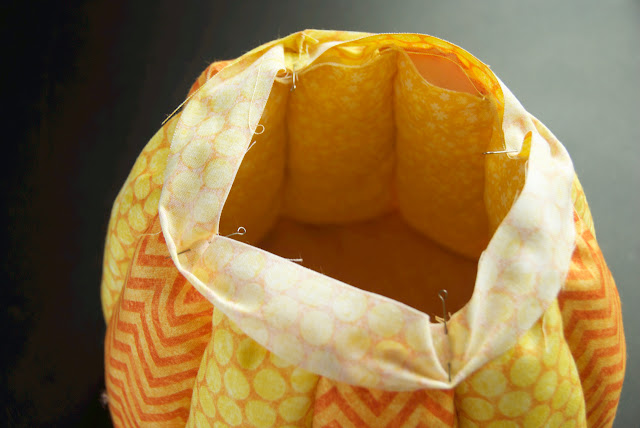
Time to bind the top. You can use your favorite binding technique here, I'll show the way I did it. Measure the circumference of your pumpkin's top. Mine was 18 inches (46 cm). Cut a strip of outside fabric 1 1/4 '' wide and 18 1/2 '' long (or whatever your measurement is plus 1/2 '') for binding and sew the short sides together to form a loop. Fold it in half and in half again and press to mark the quarters.
Match two opposing fold marks with two opposing seams on the pumpkin body and pin right sides together. Pin the other two marks to the centers of opposing segments.
Add a couple of pins in between.
Stitch 1/4 inch from the edge. If your machine has a removable platform, remove it to make things easier.
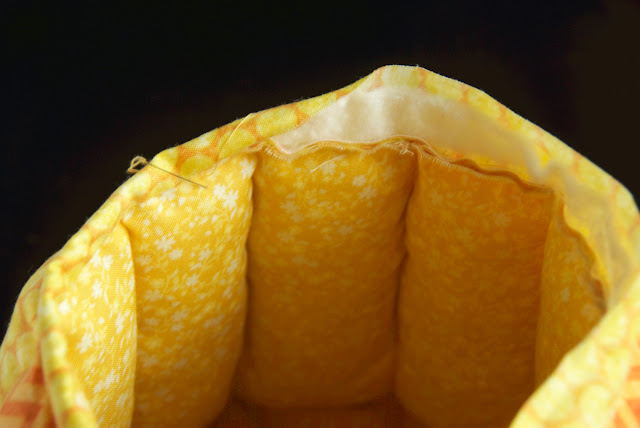
Cut a strip of batting about 3/4 '' wide and 18 '' (or whatever your measurement) long and stick it inside the binding (it's there to fill the binding and make it look prettier; mine was too skinny, should have used a thicker kind of batting or two layers perhaps).
Fold the binding the usual way (the batting strip will fold in two as well) and hand-stitch it to the inside covering the seam. You can probably machine-stitch the other side of the binding, I can't.
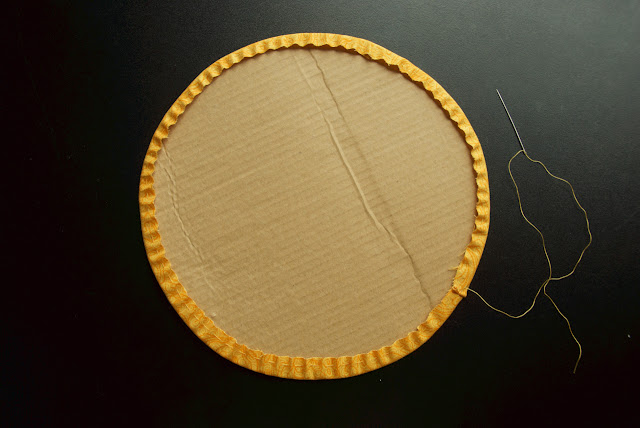
Step back, enjoy, proceed. Now we have to make the outer bottom to stabilize the whole structure and cover the seam. Cut another bottom piece out of the outside fabric with a generous seam allowance. Make a running stitch along the edge, don't cut the thread.
Trace the bottom pattern onto sturdy card-stock (without any allowances), cut it out and place on top of the fabric circle. Pull the thread until the fabric tightens around the cardstock, then make a couple of small stitches to hold it in place.
Attach the outside bottom to the pumpkin body with a ladder stitch or any other invisible stitch you prefer, make the stitches just outside the seam to conceal it.
Step back and enjoy.
Put a candy inside to see how it works. Take the candy out and eat it - you deserve a treat.
What is left is the lid to keep the candy safe inside. The lid consists of a top and a bottom and we're going to need two card-stock circles cut to the lid pattern (measure you pumpkin to make sure the lid pattern fits, otherwise adjust it as needed) - the top piece of card-stock can be thin, the bottom one should be sturdy. Cut a circle of outside fabric to the lid pattern with at least 1/2 '' seam allowance all around, make a running stitch along the edge and fill it with batting scraps or hollowfiber to make the lid top soft and rounded. Then place your thin card-stock circle on top of the filling and tighten the thread.
Cut another fabric circle to the lid pattern with a generous seam allowance (it should be the inside fabric, but I used the outside fabric for both pieces), make a running stitch and tighten it around the thick card-stock.
Put the two circles together card-stock to card-stock, and stitch them together with your invisible stitch of choice.
You'll have a lid which is flat on one side and rounded on the other. Step back and admire.
To finish it off we need a cherry stem on top. I got carried away and didn't take photos of this vital step, but I'm sure you'll manage without them. Take a piece of green fabric about 2 by 2 1/2 '' and stitch together the short sides to make a cylinder. Make a running stitch along one of the cylinder's edges and pull the thread tight to close it. Turn it right side out and fill tight with your batting scraps. Now stitch it to the center of the lid with invisible stitch.
Close the pumpkin with your lid. Open it. Close it. And open again to check if there's candy inside. Give a sigh of disappointment, close it, step back and admire.
















Very cute idea, and nicely written tutorial.
ReplyDeleteThis is adorable and I love hearing your voice in the tutorial. It was so sweet, especially this line:
ReplyDelete"Put a candy inside to see how it works. Take the candy out and eat it - you deserve a treat."
Thanks for linking up today!!
What a fantastic tutorial. I think your instructions are clear and I love how it turned out. Thank you so much for linking up! :)
ReplyDeletethis is adorable!!!! My October is filled with projects but I might try to make this one :)
ReplyDeleteThis is really cute. It would be really cute for the huge bowl of candy corn that I can't stop eating right now!
ReplyDeleteWow! What a great pumpkin! Excellent tutorial!
ReplyDeleteWow! What a great pumpkin! Excellent tutorial!
ReplyDeleteI like the abracadabra step best. :-) Your instructions are clear; I think I could end up with a pumpkin by following them. Claire aka knitnkwilt
ReplyDeleteWhat a cute idea. Thanks for the awesome tutorial!
ReplyDeleteThis is such a cute idea!
ReplyDeleteCongrats on your OMG win!
ReplyDeleteThese pumpkins are so inventive and adorable!
This is so cute!
ReplyDeleteThese are so darn cute! The way you did the lid and the base is very clever.
ReplyDeleteVery nice candy packaging idea
ReplyDelete